
This is an image to give myself an idea of what i would be creating initially, what colours i intend to use.

This is a basic colour pallet that i made quickly in Photoshop.
Firstly i had to make a height map. This is achieved by using the plane tool and a black and white image file.
The image represents the depth and height of the plane. For example darker spots on the image would represent depth in the map which could be used for pools of water and the whiter areas are the higher places such as mountains/hills or bumps in the path.


It's important that a base tone is set down for normal flat areas. of course if you want a mountain to really show then you want a really dark grey for the flat areas and a bright white for the mountain itself.
This image is the height map for my stalactites.

This is for the cave walls to give them a bump and uneven surface.
Once you've create the image for your plane you have to apply it to it.
After this is done you're able to modify the intensity which is needed to see the effect...
the following images are the result of the height maps being applied to separate planes using the displace modifier.
Here the plane hasn't got many segments so the detail of the Displace isn't very high.

Here the segment count has been increased, which increases the detail by a huge amount.

This is the stalactites map on a plane.


I created a few of these to create my walls inside my cave, sometimes whole tunnels. However i had to apply different effects such as the 'bend' tool to create curves and extrusions, as i didn't want flat walls.
This is an image of the inside of my cave before i began textuing or using bump mapping. Proper light isn't used either and here i am just showing you an example of what my basic layout of my cave is and the shape of it.
Blue is just the default colour when creating different objects, everything apart from the water which is just an example to show you were it will be placed.


These are the textures that i am going to be using on my cave, some i have Photoshoped myself to make the textures better when next to each other. I have also recoloured some of these textures to look more suitable.


This image here is what my cave looks like rendered, with these textures above, they have been bumped slightly too, which isn't too visible at the moment.
As you might of noticed the water is now gone, but will be back later..


After putting lights into the scene already the textures look better and the cave morecomes more alive. Now also I'm not getting true blacks in a sense that everything gets pretty dark but doesn't fade to black.This is important as in reality there are no true blacks, only very dark which needs to be considered when lighting a scene.

Here lighting is much softer than the one above, and the colours aren't as harsh. This is due to the skylights and omnipresent lights. These make the world have at least some light even if this is slightly visible.

Here you can see my first example and render of volumetric lighting. these render take much longer to do.
The cave is much darker now which is what i wanted although i still think there isn't enough light reflection on the water or the walls.

This here is slightly different which has more light and reflections, you can see a slight glow and glare towards the top of the screen which is what I'm aiming for.
This is the menu for my area spot light where I've added volume light in atmosphere and effects. This is what gives the effects as above.
Here is the water that i made by itself. You can see that the volume light shown here (the circle) really brings out the texture of the water and makes it much more realistic.

This is another image with 2 volume light effects added. You can see the light that is cast down in the middle as well as where it's coming from.
Below is an image of what the water looks like on a flat plane, here you can see the true detail of the material.


This is the material editor. Here is where i created my water surface.
I used a tutorial for this which basically takes you through some of the different effects you can create to make a surface look like an ocean.
 Here i am quickly going to show you how i created my lights in general but more importantly how i applied volumetric lighting too them.
 Here on the left quickly shows you how easy it is to implement lights in your scene by clicking the tab that looks like a bulb and then choosing the type of object you want, any will usually do and are all situational.
Target Spot is perhaps the most common.

 Now i am going to show you how i set up the volume lighting. Firstly i need to select a light in my scene and click on modify this will display the properties of the light underneath. go to it's properties. Under 'Atmospheres & Effects' click on add and select Volume Light.
Afterwards the below screen should appear. In this section you change the controls of the volumetric light. For iinstance the brightness of the volumetric light.
There are five different sections to look at to adjust the lighting if it isn't to your specifications.
 |
 |
| Above is what the effects menu looks like for Volumetric lighting. You can add differenteffects which are shown above. |

This is a different part of my cave, this is where i am going to place some plants and perhaps some mushrooms that i have made. At the moment it is really dark which i wish to change later to a lighter blue.

Here an omnipresent light has been installed and makes the cave appear to have fog, although this is nice i don't want the blue background.

This here is all the mushrooms and flowers together, there are also some rocks to the left which are indicated 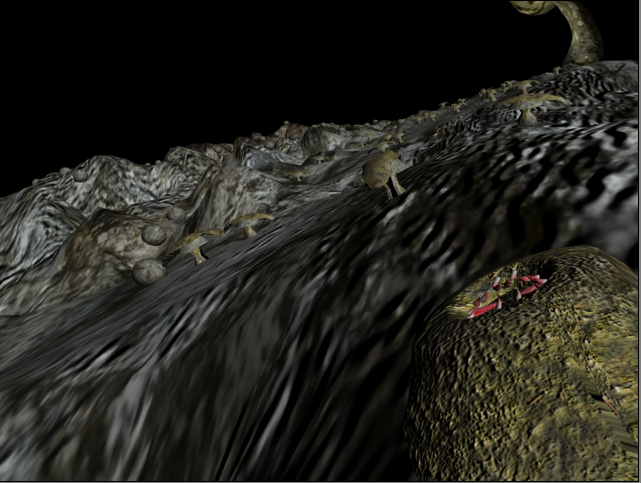
Here is a different perspective of the cave floor, mushrooms to the right and rocks to the left. This is what the blocks above look like in the above image when rendered.
